Where Websites Come To Life
How Do I Install SSL Certificate?
Posted: May 14th, 2016
An SSL Certificate is a text file with encrypted data that you install on your server so that you can secure/encrypt sensitive communications between your site and your customers.
These are the steps to install your certificate on the server.
Note: Our company provides this process for our clients free of charge from A to Z. Which means we are glad to execute the process on your behalf with no additional cost to you.
This tutorial assumes that you have already logged in to Plesk.
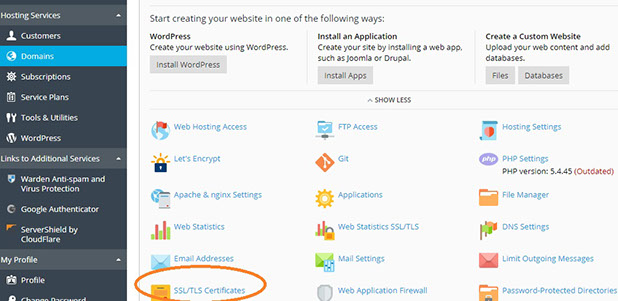
1) Go to the Websites & Domains tab and select the domain or Click on Domain Name to be secured.
2) Click on SSL/TLS Certicates
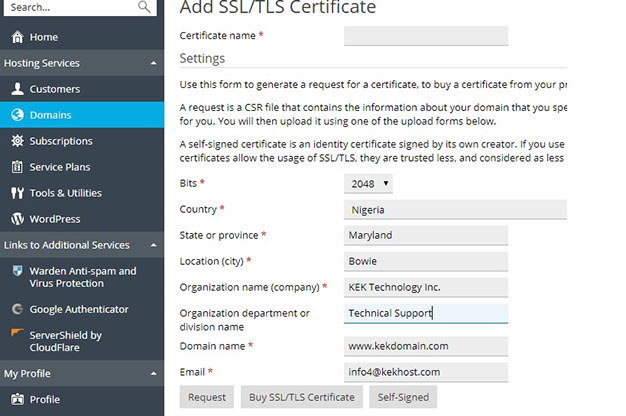
3) Click on Add SSL/TLS Certificate to generate CSR.

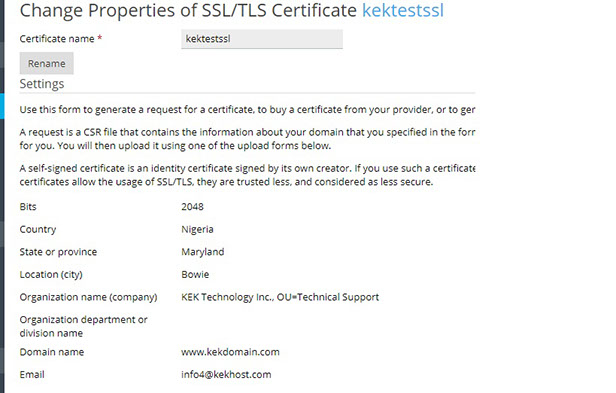
4) Fill out the fields marked with the red asterisk symbol (*), such as the certificate name (you will use it to identify the certificate in the list of all certificates), your personal information, the name of the domain the certificate will be protecting, and so on. Make sure that all information you provide is correct, as mistakes may make the certificate unsuitable and make it necessary to pay for a new one.
5) When you have finished, click Request. This will result in the CSR and the private key being generated and placed in your repository.
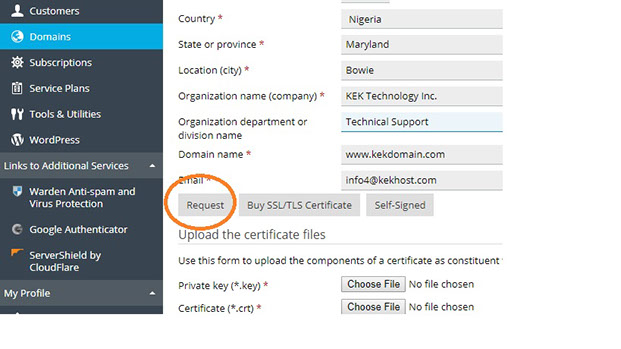
Now that the CSR has been generated, you need to provide it to the Certificate Authority of your choice to purchase a certificate from them. Alternatively, if the certificate is secured/purchased from us, the CSR should be sent to us.
6) To retrieve the CSR, go to Websites & Domains > SSL/TLS Certificates and click the name of the certificate you have just generated.
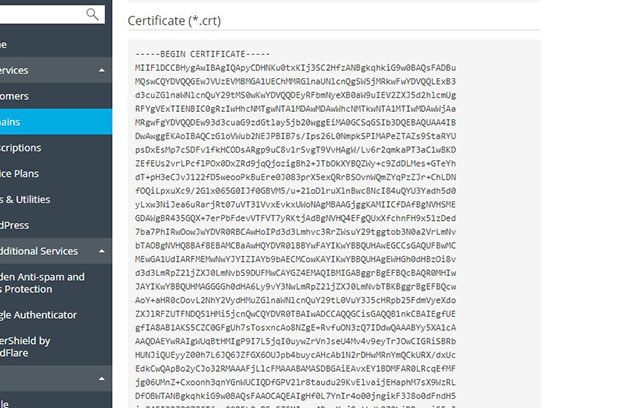
7) Scroll down to the CSR section and copy the text starting with -----BEGIN CERTIFICATE REQUEST----- and ending with -----END CERTIFICATE REQUEST----- (including those lines with all the dashes) to the clipboard. You will need to provide the CSR to the Certification Authority when purchasing your certificate.

You will need to provide the CSR to the Certification Authority when purchasing your certificate. The exact procedure differs from one Certificate Authority to another, so contact the Certificate Authority for assistance should you encounter any difficulties.
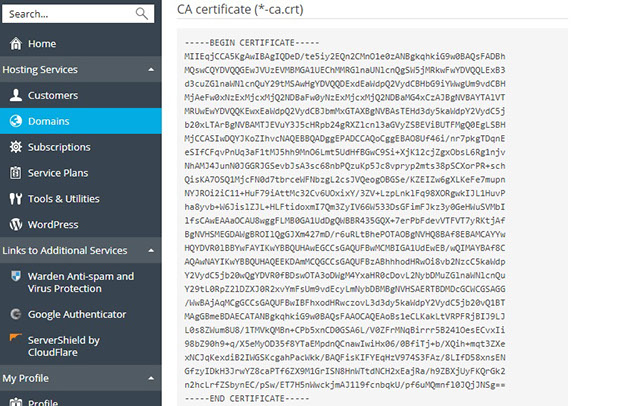
8) Once you complete the purchase from the CA or the process, you will be given the certificate in the form of either a *.crt file, a *.pem file, or in text form. You will receive a CRT and CA Files to install.
Note: Our company provides this process for our clients free of charge from A to Z. Which means we are glad to implement the process on your behalf with no additional cost to you.
Final Implemention of the Process (Installation of the actual Certificate)
To secure your website with the certificate you have purchased, you need to upload it first.
1) Go to Websites & Domains > SSL/TLS Certificates and click the name of the certificate, then upload it as described below:
> If you received the certificate in the form of a *.crt or a *.pem file, scroll down to the Upload the certificate files section and upload the file. Click Upload Certificate when you have finished.
> If you received the certificate as text, scroll down to the Upload the certificate as text section and paste the certificate into the corresponding field. Click Upload Certificate when you have finished.
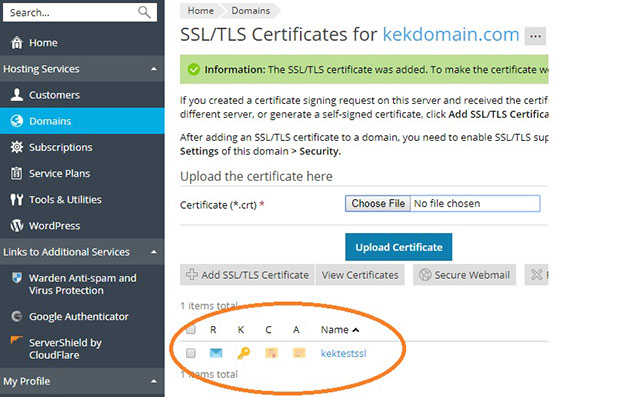
This will result in the certificate being placed in your repository as displayed below. You can see a list of all SSL/TLS certificates in your repository by going to Websites & Domains > SSL/TLS Certificates.
2) Now that the certificate has been uploaded, you need to install it.
3) Go to Websites & Domains and click Hosting Settings.
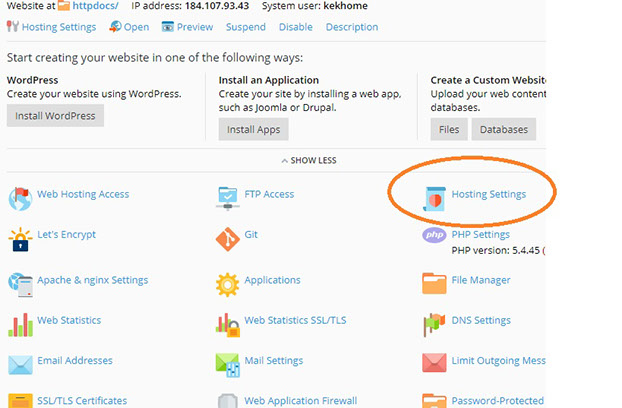
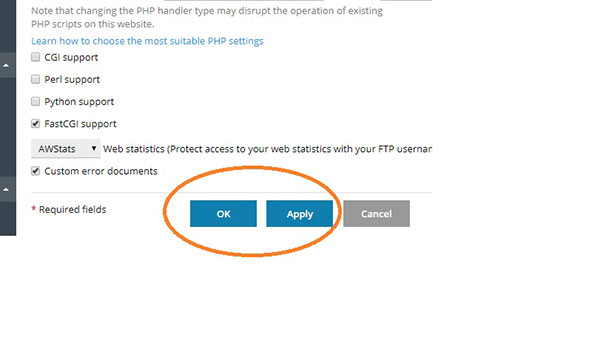
4) Scroll down to the Security Section and check the box for SSL/TLS support.
5) Click on the Down-Arrow button across from Certificate and select the certificate you have just uploaded from the Certificate menu.
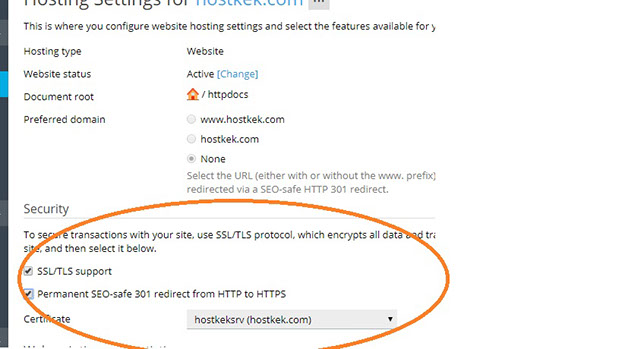
6) Then click OK or Apply to save