Where Websites Come To Life
How to Secure WordPress
Posted: May 14th, 2018
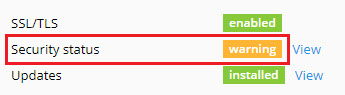
WordPress Toolkit can enhance the security of WordPress instances (for example, by turning off XML-RPC pingbacks, checking the security of the wp-content folder, and so on). You can see an instance’s security status on its card, below the screenshot of the website. If you see “warning” or “danger” next to “Security status”, we recommend that you secure your instance.
We call individual improvements you can make to an instance’s security “measures”. We consider certain measures to be critical. For that reason, WordPress Toolkit applies them automatically to all newly created instances.
Caution: Some security measures, once applied, can be rolled back. Some cannot. We recommend that you back up the corresponding subscription before securing a WordPress instance.
To secure a WordPress instance:
1) Go to WordPress, choose the instance you want to secure, and then click “View” next to “Security status” on the instance card.
2) Wait for WordPress Toolkit to display the security measures you can apply.
3) Select the security measures you want to apply, and then click Secure.
All selected measures will be applied.
In rare cases, applying security measures can break your website. In this case, you can roll back the security measures you have applied.
To roll back applied security measures:
1) Go to WordPress, choose the instance for which you want to revert an applied measure, and then click “View” next to “Security status” on the instance card.
2) Wait for WordPress Toolkit to display the list of security measures.
3) Click Revert next to the measure you want to roll back.
The applied security measures will be rolled back.