Where Websites Come To Life
Importing Websites
Posted: May 14th, 2018
You may want to import content from a different website that belongs to you but is hosted elsewhere into Plesk. Use the Site Import extension to import certain applications, folders with files, and databases. You can import content from servers running both Linux and Windows, and even from servers that do not have Plesk installed.
Starting a Website Import
By default, website import is performed in simple mode. In simple mode, you only need to specify the source website's domain name and the username and password of the FTP or SSH user that has access to the source website's files. Plesk tries to automatically detect and apply optimal settings for the import.
Note: Importing via SSH is much faster than via FTP. We recommend that you import content via SSH if possible.
To start importing content in simple mode:
1) Make sure that the Site Import extension is installed, if not contact our Technical Support Team by opening a ticket.
2) Go to Websites & Domains, select the domain you want to use as the target for importing content, and then click Website Importing.
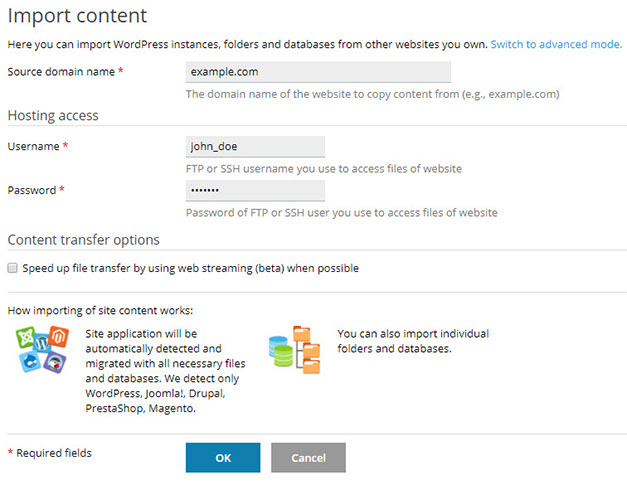
3) Specify the domain name of the website you want to import content from in the "Source domain name" field.
4) Specify the username and password of an FTP or SSH (Plesk for Linux only) user on the source server that has access to the source website's files.
5) Select the "Speed up file transfer by using web streaming (beta) when possible" checkbox if you want to import a large number of small files, or if you suspect that the import may be interrupted (for example, because of unstable Internet connection or insufficiently large PHP maximum execution time). Selecting the checkbox enables Plesk to resume interrupted import instead of starting over.
Note: This feature is still in beta, so only select the checkbox if you do not mind potentially encountering bugs in exchange for increased import speed.
6) Click OK.
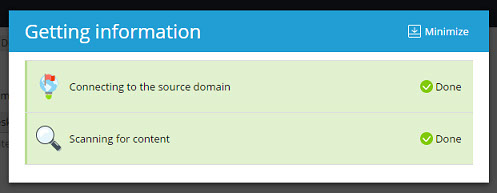
Plesk will try connecting to the source website and scanning it for content. If the connection is successful, select one or more objects of the following types types to import:
> Applications
> Folders
> Databases
If the connection is not successful, make sure that the following requirements are met and try again:
> The source website's domain name resolves to the correct IP address from the target server.
> The FTP or SSH username and password are correct. The FTP or SSH user has access to all files and directories of the source website.
> You can connect to the source server via FTP from the target server.
If the connection is successful but scanning for content fails, you can try importing in advanced mode. In advanced mode you can explicitly choose the connection type, specify the document root, choose the protocol for data transfer, and more.
To start importing content in advanced mode via SSH:
1) Make sure that the Site Import extension is installed.
2) Go to Websites & Domains, select the domain you want to use as the target for importing content, and then click Website Importing.
3) Click "Switch to advanced mode".
4) Specify the domain name of the website you want to import content from in the "Source domain name" field.
5) Under "Connection type", select "SSH".
6) Specify the username and password of an SSH user on the source server that has access to the source website's files in the corresponding fields.
7) If the source server is configured to use a different SSH port than the default 22 port, specify the custom port number in the "SSH port" field.
8) Select the desired method for transferring content under "Way to transfer files":
> (Recommended) If you keep "Automatic", Plesk will first try to import content via rsync, the fastest method. If the attempt fails, Plesk will use SCP instead.
> To have Plesk use rsync or SCP, select the corresponding option.
> You can also have Plesk use web streaming by selecting it from the list. Web streaming is good when you need to import a large number of small files or if you believe that the import may be interrupted, but choosing it may cause issues with the import.
9) Specify where to look for the website files in the "Source document root" and "Files root" fields:
> If the document root of the source website is inside the home directory of the SSH user, specify the document root absolute path in the "Source document root" field and keep the "File root" field empty. For example, if the document root of the source website is /var/www/vhosts/example.com/httpdocs and the home directory of the SSH user is /var/www/vhosts/example.com, you need to specify /var/www/vhosts/example.com/httpdocs in the "Source document root" field and keep the "File root" field empty.
If the SSH user is chrooted, the document root absolute path you need to specify in the "Source document root" field is /httpdocs.
> If the home directory of the source website is outside the home directory of the SSH user, specify the document root absolute path in the "File root" field and keep the "Source document root" field empty. For example, if the document root of the source website is /var/www/vhosts/example.com/httpdocs and the home directory of the SSH user is /root, specify var/www/vhosts/example.com/httpdocs in the "File root" field and keep the "Source document root" field empty.
10) Specify the full URL corresponding to the document root of the source website in the "Source website URL" field. For example, if the document root is /var/www/vhosts/example.com/httpdocs (or just /httpdocs if the SSH user is chrooted), specify https://example.com in the "Source website URL" field. If the document root is var/www/vhosts/example.com/httpdocs/my/wordpress, specify https://example.com/my/wordpress in the "Source website URL" field.
11) Click OK.
To start importing content in advanced mode via FTP:
1) Make sure that the Site Import extension is installed.
2) Go to Websites & Domains, select the domain you want to use as the target for importing content, and then click Website Importing.
3) Click "Switch to advanced mode".
4) Specify the domain name of the website you want to import content from in the "Source domain name" field.
5) Under "Connection type", select "FTP".
6) Specify the username and password of an FTP user on the source server that has access to the source website's files in the corresponding fields.
7) Select the desired method for transferring content under "Way to transfer files":
> (Recommended) If you keep "Automatic", Plesk will use FTP to import content.
> You can also have Plesk use web streaming by selecting it from the list. Web streaming is good when you need to import a large number of small files or if you believe that the import may be interrupted, but choosing it may cause issues with the import.
8) Specify the document root of the source website starting from the FTP user's home directory in the "Source document root" field. For example, if the document root of the source website is /var/www/vhosts/example.com/httpdocs and the home directory of the FTP user is /httpdocs, specify /httpdocs in the "Source document root" field and keep the "File root" field empty.
9) Specify the full URL corresponding to the document root of the source website in the "Source website URL" field. For example, if the document root is /var/www/vhosts/example.com/httpdocs, specify https://example.com in the "Source website URL" field. If the document root is var/www/vhosts/example.com/httpdocs/my/wordpress, specify https://example.com/my/wordpress in the "Source website URL" field.
10) You can specify an FTP server charset other than the default "UTF-8" to prevent corrupt encoding when importing from an old source server. To do so, select the desired charset from the "FTP server charset" drop-down list or use search.
11) Keep the "Use the same IP for FTP data connection as for FTP control connection" checkbox selected. You need to clear this checkbox only if the FTP server is configured in such a way that command and data channels use different IP public addresses.
12) Click OK.